Creating the CI/CD pipelines for one of my teams, I was somewhat shocked to learn that on previous projects they either did build the frontend by hand, or had a build pipeline rebuilding for every single environment (and using the slower npm i). This resulted in pipelines running for more than an hour.
If you want to do CI/CD ’the right way’, you build your code once and promote the output (binaries, JavaScript files, …) between the environments after each approved test.

I have done this many times before for backend .NET code. But it was the first time I had to set this up for an Angular site. Since the team had no other experience than recompiling with different environment files, I turned to Google and found this article by Bjorn. I will not copy his post, but if it would go down be sure to ping me to extend this post.
Just a quick code snippet to show the config used for a frontend with Entra ID authentication.
import { InjectionToken } from '@angular/core';

export type Config = {
  authClientId: string;
  authAuthority: string;
  apiConfigScopes: string[];
  apiUri: string;
};

export const APP_CONFIG: InjectionToken<Config> = new InjectionToken<Config>(
  'Application Config'
);
Shortcut by overwriting environment variables
As the existing code base was already using environment variables in more than 200 different places (don’t ask me why …), I agreed with the team to overwrite the environment variables on startup rather than inject the config in every place needed and rewrite a major part of the codebase.
export const environment = {
  msalConfig: {
      auth: {
          clientId: '<app guid>',
          authority: 'https://login.microsoftonline.com/<tenant guid>'
      }
  },
  apiConfig: {
      scopes:['api://<xyx>/api.read'],
      uri: 'https://<yourapi>.azurewebsites.net/'
  },
  ...
};
The caveat however was that this application was using MSAL for authentication. Overwriting the environment variables in the AppComponent constructor happens at a point in time after the MSAL interceptors and guards are instantiated. As these are functions, they cannot accept an InjectionToken as method parameter either.
Solution
While Bjorn injected the config in the AppComponent class, I simply moved the InjectionToken into the AppModule class (as agreed with the frontend lead).
export class AppModule {
  constructor(@Inject(APP_CONFIG) readonly config: Config) {
    // load config into environment variables
    environment.msalConfig.auth.clientId = config.authClientId;
    environment.msalConfig.auth.authority = config.authAuthority;
    environment.apiConfig.uri = config.apiUri;
    environment.apiConfig.scopes = config.apiConfigScopes;
  }
}
Note: There are certainly cleaner solutions, but this was good enough to make it run within the limited time available (and my limited skills on Angular).
Build pipeline
Like mentioned before, the build pipeline has to make a single output. By having the config files defined as assets in angular.json, they are part of the build output.
	"assets": [
		"src/favicon.ico",
		"src/assets",
		"src/config" // <--- Add this line and make sure it points to your folder.
	],
In the build pipeline, I opted for npm ci and a straight forward build. After that, simply package the artifacts in a zip file to make it more manageable.
pool:
  vmImage: 'ubuntu-latest'

steps:
  - checkout: self
    fetchDepth: 0

    # Do other tasks like GitVersion

  - task: UseNode@1
    inputs:
      version: '16.x'
    displayName: 'Install Node.js'

  - script: |
      npm ci
    displayName: 'npm ci'

  - task: Npm@1
    displayName: Build
    inputs:
      command: custom
      customCommand: 'run build'

  - task: ArchiveFiles@2
    displayName: 'Archive files'
    inputs:
      rootFolderOrFile: '$(System.DefaultWorkingDirectory)/dist/'
      includeRootFolder: false
      archiveType: zip
      archiveFile: $(Build.ArtifactStagingDirectory)/Web.zip
      replaceExistingArchive: true

  - task: PublishBuildArtifacts@1
    inputs:
      PathtoPublish: '$(Build.ArtifactStagingDirectory)/Web.zip'
      ArtifactName: 'Web'
      publishLocation: 'Container'
Release pipeline to deploy to SWA
For the release pipeline, I opted for a multi-stage pipeline with environments and a deploy template.
# Do not trigger by default, we will trigger on a completed pipeline
trigger: none

resources:
  pipelines:
  - pipeline: buildpipeline # Name of the pipeline artifact resource.
    source: Build Web # Name of the build pipeline as shown in Azure DevOps
    trigger:
      branches:
        include:
        - main
        - releases/*
        exclude:
        - features/*

stages:
- stage: 'dev'
  displayName: 'Deploy DEV'
  condition: or( eq(variables['Build.SourceBranch'], 'refs/heads/main'), startsWith(variables['Build.SourceBranch'], 'refs/heads/releases'))
  variables:
    - group: deploy-variables-dev
    - name: "environment"
      value: "dev" # This will add this environment in Azure Devops and report pipeline execution for that environment
  jobs:
    - template: jobs/deploySingleEnvironment.yml
      parameters:
        deployEnvironment: 'dev'
        azureSubscription: 'AzureConnectionDev'

# Other stages
As you can see in the pipeline fragment above, we’ll be using a variable group in Azure DevOps to define our variables. This minimizes having to define variables for all environments in the pipeline itself.
Below is (part of) our template to make sure we can use the right config file for each environment.
jobs:
- deployment: 'Deploy'
  pool:
    vmImage: 'ubuntu-latest'
  environment: ${{ parameters.deployEnvironment }}
  strategy:
    runOnce:
      deploy:
        steps:
        - checkout: none

        - task: ExtractFiles@1
          displayName: 'Extract'
          inputs:
            archiveFilePatterns: '$(Pipeline.Workspace)/**/*.zip'
            destinationFolder: $(Build.ArtifactStagingDirectory)/Web

        # Remove the default (local dev?) config
        - task: PowerShell@2
          displayName: 'Delete default config'
          inputs:
            targetType: inline
            script: Remove-Item -Path '$(Build.ArtifactStagingDirectory)/Web/site/config/config.json'

        - task: PowerShell@2
          displayName: 'Overwrite config'
          inputs:
            targetType: inline
            script: Rename-Item -Path '$(Build.ArtifactStagingDirectory)/Web/site/config/config.$(ENV).json' -NewName '$(Build.ArtifactStagingDirectory)/Web/site/config/config.json'

        - task: AzureStaticWebApp@0
          displayName: 'Deploy SWA'
          inputs:
            cwd: '$(Build.ArtifactStagingDirectory)/Web/site'
            app_location: '/'
            azure_static_web_apps_api_token: $(SwaPortalDeploymentToken)
            skip_app_build: true
If you want to double check the config file in the pipeline output (since we’re unable to browse these files on SWA), you can use the following tasks:
        - task: PowerShell@2
          displayName: 'List files'
          inputs:
            targetType: inline
            script: Get-ChildItem -Path '$(Build.ArtifactStagingDirectory)/Web/*.*' -recurse -force

        - task: PowerShell@2
          displayName: 'List file content'
          inputs:
            targetType: inline
            script: Get-Content -Path '$(Build.ArtifactStagingDirectory)/Web/site/config/config.json'
AzureStaticWebApp task
If you configure a pipeline directly in the Azure Portal from within the SWA resource, it will try to build the code and then deploy. Since we already did that part in the build pipeline, we set skip_app_build: true, following the docs for the AzureStaticWebApp task.
Next, we’ll have to tell the task in which directory to run. Initially, I’ve tried to set the app_location variable, but we have to change the working directory (alias cwd) as explained on this GitHub issue.
The third part is using the right deployment token. We find this in the Azure portal on the Azure Static Web App resource, and place it in the Azure DevOps variables.

Result
Running the pipeline will switch out the config file to the desired file for that environment. The next step is the actual deployment to the Azure Static Web App (including a CDN refresh). On launch of the frontend in your browser, Angular will read the renamed config.json file and load the correct configuration.
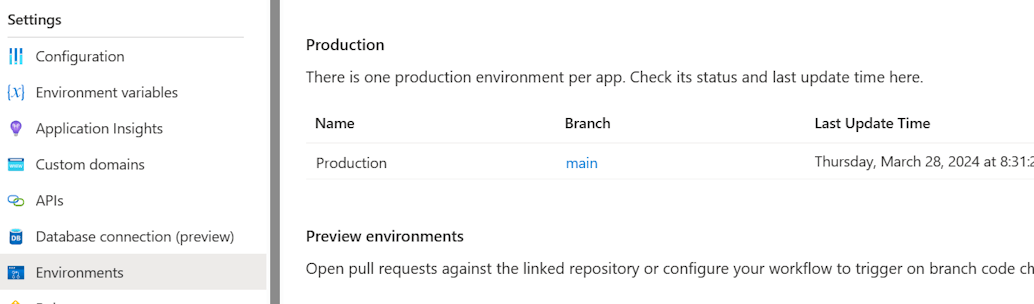
In the portal, we can watch the latest deployment under the Environments blade of the SWA.
Finally, in Azure DevOps we can also see that we now have a decent CD pipeline delivering our content files to 4 different environments similar to our backend.
