With Visual Studio 2010 we received a widespread architecture tools to keep the design and the implementation of your application together. For a quick overview of all the tools, you can check out Somasegar’s post. For this post I’ll drill down into sequence diagrams.
Since you can’t generate code from a sequence diagram right now, you’ll mainly use this new feature to do reverse engineering and create the diagram from your existing code. I’ve been trying out several things with the ‘Generate Sequence Diagram’ functionality and stumbled upon a few nice features and also on some minor problems that are still being worked on.
To get started you navigate to the code for which you want to create a sequence diagram. Either right-click on the method definition or on a selected block of code and in the context menu you’ll find ‘Generate Sequence Diagram’. Note that this is only available in the Ultimate version.

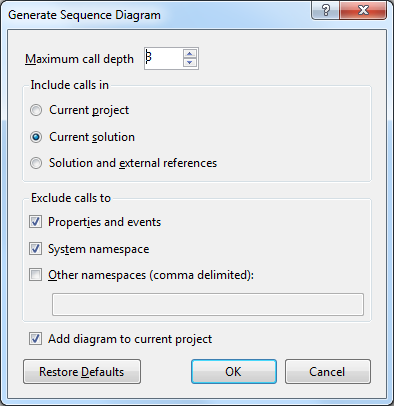
In the Generate a Sequence Diagram dialog box you can specify the maximum level of method calls that you want to see (call depth). Next you define if you want the calls in the current project, the entire solution or also external references. Quite often you’ll want to skip out calls to properties and events or the system namespace. Other namespaces can also be excluded if desired.

You can opt to add the diagram to the current project, which is the project where your code fragment resides in, or just generate it and save it in another location (and possibly add to another project) afterwards. After some time (depending on the size of your solution and the depth of the method calls) the diagram pops up in a new window.

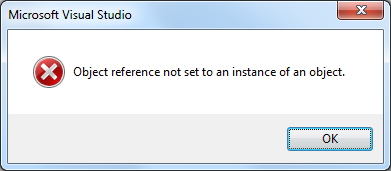
Since I was documenting a solution with multiple projects, I chose for the second option to keep all diagrams together in a single project. My first idea was to create a new Modeling Project and add all my diagrams to that project. At first everything is fine, you can edit and save your sequence diagram in the modeling project without any problems. But after you close the diagram and reopen it for another edit, it seems like the diagram got decoupled and you receive an “Object reference not set to an instance of an object.” error when you try to delete an existing lifeline.

Everything seems fine if I add my newly generated diagrams to a regular C# Class Library project instead. There is no need to add a reference to the library in which the initial code fragment resides.
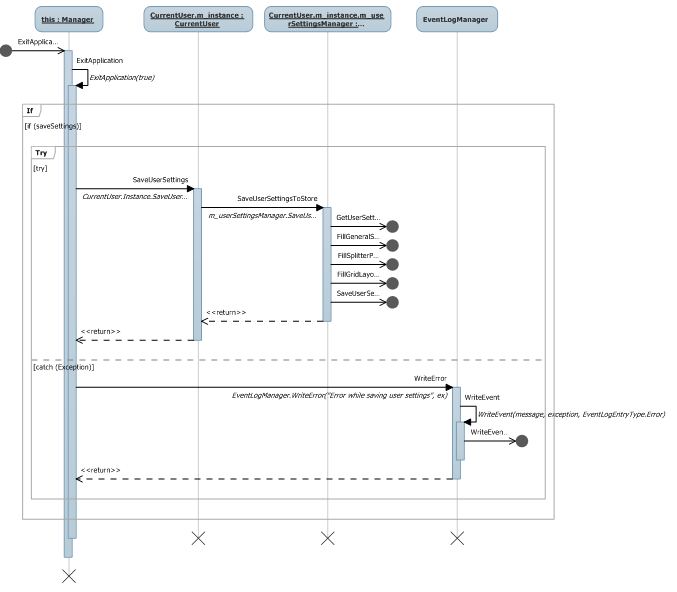
Sometimes you can get quite a large diagram and depending on the level in detail you require, you might want to extract some parts of the diagram to a new sequence diagram. Or some parts of the diagram might contain some other functionality than the main sequence, e.g. error logging. One way to do this is delete the parts you extract from the original one, and create a new diagram from code as before. You can however right-click a message and then ‘Move to Diagram’ in the context menu. As for now you can’t copy-paste a part of the diagram to a new sequence diagram.

This will create the new diagram, but also a visible link from the original diagram to the new one.

At some point you might find out that you didn’t went deep enough in the call stack and some method calls are not completely on your diagram. At this point you can right-click on the message and then click ‘Expand Outgoing’. The diagram will use the most recently used call depth to expand this message and show the new lifelines.
You can delete messages or complete lifelines to clean up your sequence diagram if needed. Don’t forget to hit ‘Rearrange Layout’ (right-click on blank area of the diagram) to remove the whitespaces from cleaning up and return to a nicely formatted diagram. One thing to note here is that lifelines don’t get shortened automatically (being worked on for a future release). You might want to do this yourself because long lifelines also mean that they take up the possible space of your diagram when you want to print it on paper or to XPS.
PS: The Visual Studio 2010 release candidate (RC) was made available about a week ago and can be downloaded here.