Most mobile and desktop apps have a rather simple startup sequence: show a splash screen, maybe navigate through a login page and finish on the main page. One of the business apps we’re working on in our spare time has a somewhat more complex startup where you can end up on one of five different pages depending on configuration and the current state (not counting any deep linking).
Problem
Working out an example with five different landing pages is a bit too complex to show the solution, so let’s use this case instead.

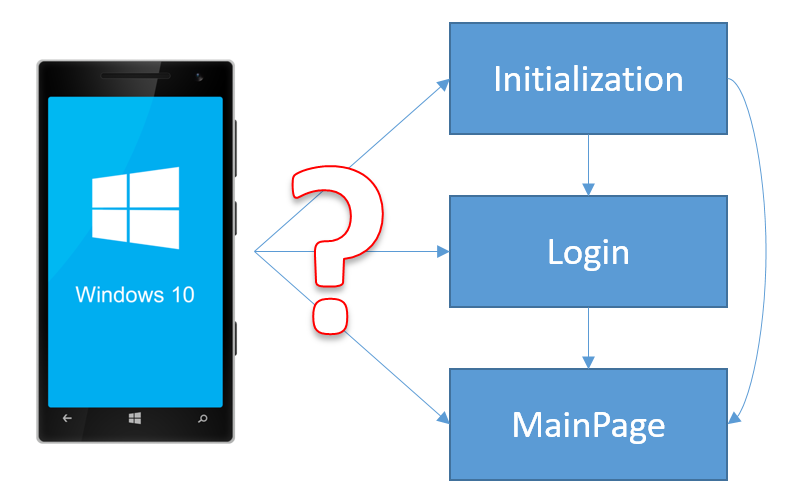
When you launch the mobile app, you have following possible scenario’s:
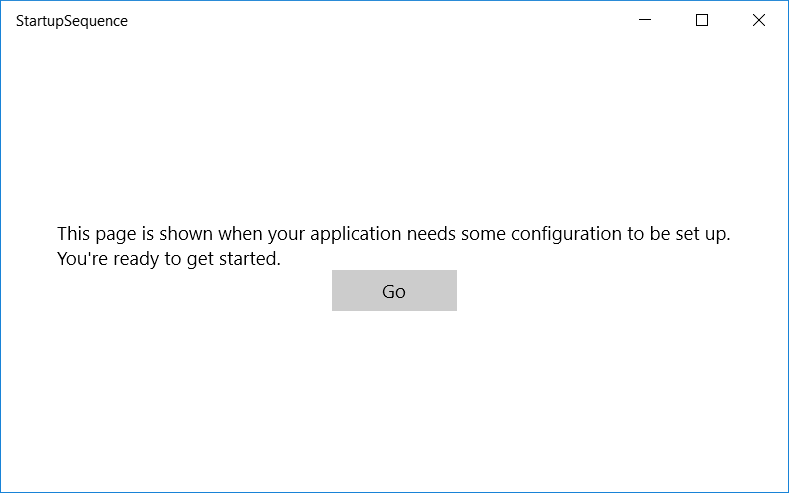
- On first run, there is some initialization to be executed. You provide a fancy screen guiding your user through.
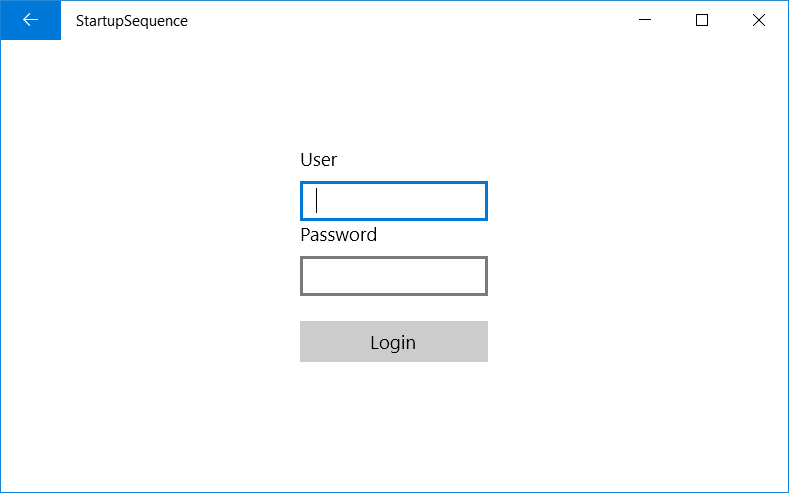
- When the user is currently not logged in, (s)he has to provide credentials.
- Since your application is connected to the cloud, it’s possible that after initialization the user gets automatically logged in through roaming settings.
- Once setup and login is correctly done, the user gets to the main page.
Of course we don’t want to burden the user with the previous steps if that’s not necessary. You can easily throw everything onto a single page and show/hide parts, but that isn’t a clean (and maintainable) solution. So the ideal solution would be three separate pages, each only shown when necessary.
Project setup
The first step is to create your three pages and make navigation between all three possible. This can be done with a simple Frame.Navigate or by using any of the existing MVVM frameworks out there. As you might know, I’m a big fan of Prism, so this will be part of the solution. You can use this blog post to implement the solution with the framework of your choice (or without), while the next post will take it a step further and (partially) integrate the solution with Prism.
My first page is where initialization happens. This can be a long running process, requiring input from the user, … Or simply a message and a button.

As I’m using Prism, all the required logic is in my viewmodel.
using Prism.Commands;
using Prism.Windows.Mvvm;
using Prism.Windows.Navigation;
using StartupSequence.Services;

namespace StartupSequence.ViewModels
{
    internal class SetupPageViewModel : ViewModelBase
    {
        private readonly INavigationService _navigationService;
        private readonly IApplicationSettingsService _applicationSettingsService;

        public SetupPageViewModel(INavigationService navigationService, IApplicationSettingsService applicationSettingsService)
        {
            _navigationService = navigationService;
            _applicationSettingsService = applicationSettingsService;

            GoCommand = new DelegateCommand(OnGoClicked);
        }

        public DelegateCommand GoCommand { get; private set; }

        private void OnGoClicked()
        {
            _applicationSettingsService.SetConfigurationCompleted();
            _navigationService.Navigate(PageTokens.LoginPage, null);
        }
    }
}
Now you might be wondering, which settings? For this sample I’ve stored both the login and the fact that configuration is completed in the app’s LocalSettings. If you want to know how to use the LocalSettings, see the code below.
using Windows.Storage;

namespace StartupSequence.Services
{
    /// <summary>
    /// This would probably do some async calls to local storage or the cloud
    /// Keeping it simple for sample purposes
    /// </summary>
    internal class ApplicationSettingsService : IApplicationSettingsService
    {
        private const string KeyUsername = "Username";
        private const string KeyConfiguration = "Configuration";

        public void Login(string username)
        {
            ApplicationData.Current.LocalSettings.Values[KeyUsername] = username;
        }

        public string GetUser()
        {
            return ApplicationData.Current.LocalSettings.Values[KeyUsername]?.ToString();
        }

        public void SetConfigurationCompleted()
        {
            ApplicationData.Current.LocalSettings.Values[KeyConfiguration] = true;
        }

        public bool IsConfigured()
        {
            if (ApplicationData.Current.LocalSettings.Values.ContainsKey(KeyConfiguration))
                return (bool) ApplicationData.Current.LocalSettings.Values[KeyConfiguration];
            return false;
        }

        public void ClearSetup()
        {
            ApplicationData.Current.LocalSettings.Values[KeyConfiguration] = false;
        }

        public void Logout()
        {
            Login(null);
        }
    }
}
Once setup is completed, we navigate to the login page using the correct ‘page token’ (as navigation in Prism is string based).

This page works quite similar, with all logic in the viewmodel and two TextBox controls with TwoWay binding.
using Prism.Commands;
using Prism.Windows.Mvvm;
using Prism.Windows.Navigation;
using StartupSequence.Services;

namespace StartupSequence.ViewModels
{
    internal class LoginPageViewModel : ViewModelBase
    {
        private readonly INavigationService _navigationService;
        private readonly IApplicationSettingsService _applicationSettingsService;

        public LoginPageViewModel(INavigationService navigationService, IApplicationSettingsService applicationSettingsService)
        {
            _navigationService = navigationService;
            _applicationSettingsService = applicationSettingsService;

            LoginCommand = new DelegateCommand(OnLoginClicked);
        }

        private string _username;
        public string Username
        {
            get { return _username; }
            set { SetProperty(ref _username, value); }
        }

        private string _password;
        public string Password
        {
            get { return _password; }
            set { SetProperty(ref _password, value); }
        }

        public DelegateCommand LoginCommand { get; private set; }

        private void OnLoginClicked()
        {
            _applicationSettingsService.Login(Username);
            _navigationService.Navigate(PageTokens.MainPage, null);
        }
    }
}
We’re again navigating to the next page (now the main page) with the correct token after the actual login.

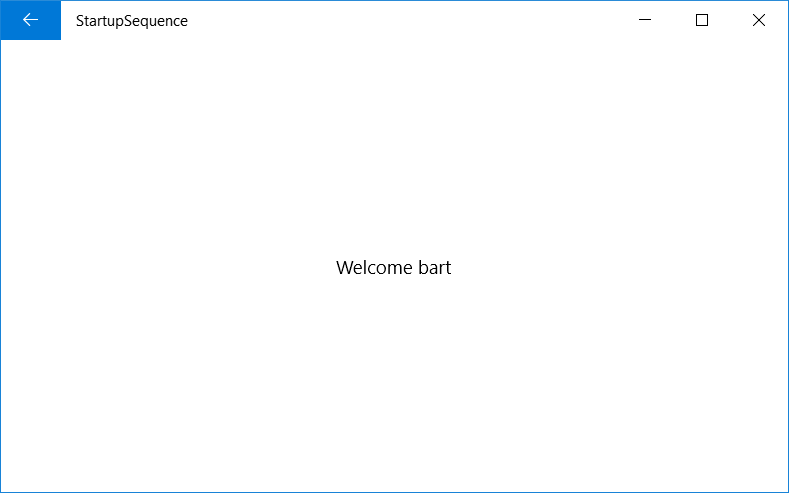
On the main page, we’re simply showing the user’s name.
This setup works if you have a straight-forward workflow, but passing through every single step every time the app starts, isn’t a friendly user experience. So let’s write some logic to decide which pages should be shown.
Solution
There might be multiple solutions to this problem, but my ‘spare-time colleague’ Glenn came up with using an actual Queue object to keep track of the pages to visit. This worked very nice in the ‘Proof of Concept’ app he made. Always make a PoC when testing something new, this takes away the added complexity and possible side-effects of your real application. Bringing it into our application with Prism required some small refactoring, which resulted into this solution.
First of all you need a Queue object to track the pages, and preferably a small wrapper around it to enqueue and dequeue your pages. Either make this wrapper static or add it to your IoC container so it can be resolved (if you’re this far, I suppose you’re using dependency injection as well).
using System.Collections.Generic;

namespace StartupSequence.Services
{
    public static class StartupService
    {
        private static readonly Queue<string> BootSequence = new Queue<string>();

        public static bool StartupRunning { get; set; }

        public static void AddToBootSequence(string view)
        {
            BootSequence.Enqueue(view);
            if (BootSequence.Count > 0)
                StartupRunning = true;
        }

        public static string GetFromBootSequence()
        {
            string view = BootSequence.Dequeue();
            if (BootSequence.Count == 0)
                StartupRunning = false;

            return view;
        }
    }
}
Once you got this wrapper service, the next step is telling which pages should be queued for navigation. Since we’re dealing with application startup, this has to be done before navigating to the first page. In Prism, that logic is in the OnLaunchApplicationAsync method.
    protected override async Task OnLaunchApplicationAsync(LaunchActivatedEventArgs args)
    {
        if (args.PreviousExecutionState != ApplicationExecutionState.Running)
        {
            // Here we would load the application's resources.
        }

        await FillNavigationQueueAsync();
        await LoadAppResources();

        //NavigationService.Navigate(PageTokens.SetupPage, null);
        NavigationService.Navigate(StartupService.GetFromBootSequence(), null);
    }

    protected override void ConfigureContainer(ContainerBuilder builder)
    {
        builder.RegisterType<ApplicationSettingsService>().As<IApplicationSettingsService>().SingleInstance();
        base.ConfigureContainer(builder);
    }

    /// <summary>
    /// We use this method to simulate the loading of resources from different sources asynchronously.
    /// </summary>
    /// <returns></returns>
    private Task LoadAppResources()
    {
        return Task.Delay(1000);
    }

    private async Task FillNavigationQueueAsync()
    {
        // do some async tasks to check the startup logic

        var applicationSettingsService = ServiceLocator.Current.GetInstance<IApplicationSettingsService>();

        // step 1: check initial setup
        if (!applicationSettingsService.IsConfigured())
        {
            StartupService.AddToBootSequence(PageTokens.SetupPage);
        }

        // step 2: check user logged in
        if (string.IsNullOrEmpty(applicationSettingsService.GetUser()))
        {
            StartupService.AddToBootSequence(PageTokens.LoginPage);
        }

        // step 3: actual main page
        StartupService.AddToBootSequence(PageTokens.MainPage);
    }
Above code first fills up the queue depending on some ‘business logic’ in the FillNavigationQueueAsync method. Once this is done, the first page navigate happens by getting the page from the queue instead of a hardcoded navigate.
This works, with only one problem left: if you look at the page screenshots above, you’ll notice the back button on all but the first page. During the initial startup sequence, you don’t want your user to be able to go back, so we’ll have to clear the navigation’s backstack. Since we’re using Prism (which wraps the Frame object), we have to use the clear method on the NavigationService instead of simply clearing the backstack on the frame.
    private void OnGoClicked()
    {
        _applicationSettingsService.SetConfigurationCompleted();
        _navigationService.Navigate(StartupService.GetFromBootSequence(), null);
        _navigationService.RemoveAllPages();
        // or _navigationService.ClearHistory(); in next minor release of Prism, current one has a bug
    }
This concludes current post. If you want to refactor away some of this logic so you don’t have to remember clearing the backstack, please do read the next post as well.
The code is available on Github.
Bonus
I haven’t tried it yet, but I have a good feeling on using this Queue for implementing wizards as well. With the great bonus of being able to change your wizard’s flow based on decisions made during one of the steps.